Assembling regular aluminum frames.
Picture one
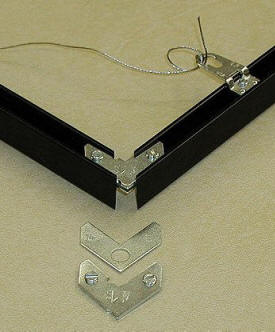
Joining corners:
1. Turn the frame parts face down on a table.
2. The top plate has 2 screws. Place the top plate on top of the bottom plate, and insert both into the slots in the bottom of the frame.
3. Tighten the screws just to the point of being almost
snug.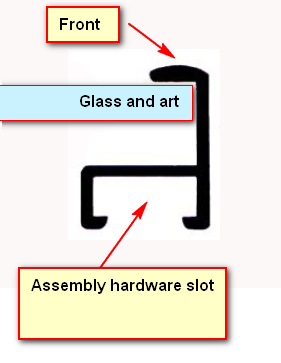
Assembling the frames
1. Take a shorter piece and join it to one of the longer pieces.
2. Take the other long piece and join it to the assembly.
You should now have the assembled framing looking like that of the picture #2.
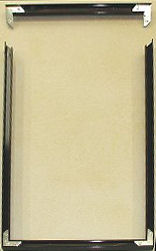
Picture Two
3. Insert the glass, image, backing and mat package into the frame, upside down.
4. Insert the bottom and top plates into the last frame piece.
5. Join the last piece to complete the frame. Tighten the screws to the point of being almost snug.
6. Turn the whole frame over very carefully, as the frame parts may slip apart. Check for specks between the mat and glass, and for other problems.
7. Turn the unit over once again, and tighten the screw carefully. Be sure to hold the corners together tightly to prevent gaps.
8. Insert the springs, starting about 3 inches from each corner. The "feet" of the springs should be against the backing, and the "hump" of the spring against the back of the frame. Note: If you are using foamcore or similar backing, the package will fit snug and the springs may not be necessary.
9. Insert the two wire hangers. They should be placed about one third of the way down the frame from the top. Screw tightly.
10. Note in the first picture above, the wire loops through the hanger twice. Then pull the loop tight, and twist the excess wire around the main wire.
11. Insert the other end of the wire through the second hanger. Pull the wire towards the top of the frame until it is 1 inch below the top. Then loop the wire through the hanger as you did on the first one and twist it. Cut off the excess wire.